Wednesday, April 30, 2008

How does my camera sensor work?

Before we can continue our exploration into what exposure is, and how to get more out of your camera, we have to hash out a few issues. These issues revolve around what the eye can discern when looking at a scene and what the camera can discern when looking at the same scene. This entry will revolve around the difference between the two and some of the why behind it.

The eye is truly a wonderful instrument. It has a dynamic aperture and can recognize billions of colors. Through evolution the eye has been attuned to certain colors better than others. The human eye is more sensitive to green than it is to red. This makes sense because our world is more green than red. Having a hypersensitivity to green would have helped man to hunt. It's no wonder that the Nikon D200's sensor is "CFA Pattern: GREEN RED BLUE GREEN". 50% of your camera's sensor is capable of only reading green!

This is what a cross section of your sensor would look like:


This is what it would look like if you could see the light coming through your lens and striking your sensor. The light passes through your lens, past your shutter, and is filtered by colored filters on top of each pixel sensor. The filter only absorbs one color in the light spectrum and this is recorded onto that pixel.

So, if this is true, why isn't your picture nothing but red blue and green pixels when you zoom in far enough? The camera's brain reads the intensity of the color from each sensor and determines how intense it is in comparison to its neighbor.

For example. If you shot a picture of a nice green lawn, the light would be hitting the sensor and the green sensor would be getting a lot of light intensity. The red would be getting next to nothing and the blue a small amount also. The camera, would compare these three values and say, "this is mostly green" and would blend the color through all the neighboring sensors. This process is called interpolation and is common in all sorts of image manipulation. The downside of interpolation is that it will soften the focus of your image. this is why people will sharpen their images in photoshop before printing, to offset some of the softening that the electronic sensor automatically does when determining proper color representation.

The next lesson will explore why your eye can see more than your film can record.

Tuesday, April 29, 2008

Exposure in the film and digital age

In previous lessons we learned how the camera figures exposure and how to adjust it to get the sort of exposure you want. ISO, shutter speed, and aperture make up the bulk of the knowledge needed to put exactly as much light on the film (or sensor) as you want. Now that you know that, what else do you need to know about it? You need to know it all depends on the sensor you're using.

Camera sensors between manufacturers and even between models from the same manufacturers aren't the same. Some may read a little hotter than others while some might be a little warmer (orange) or cooler (bluish). Some sensors even interpret light intensity a little differently than others. How does this affect you? Let's consider a few facts first.


The typical photograph is a mix of light colors, medium colors, and dark colors. In the age of film people used to think a perfectly straight line between the colors was the holy grail of photography.


The typical photo of the day was more of an S curve. In layman's terms this means that parts of the photo that were lighter than the average brightness are slightly over exposed. And parts of the image that were slightly darker than the average of the photo were lightly underexposed. This is commonly referred to as being "crushed". Once people had the technology that allowed them to make a perfect linearly exposed photo, they learned that they didn't like how it looked! The holy grail was useless! It seemed dull and grey and not very eye catching. This S curve is called contrast, and the human eye likes a certain amount of contrast in an image. Most, if not all, digital cameras will automatically render your photos in this manner so, you don't need to worry about it. But it is good information to know as the more you know the more you can control the output of your own photographs.

Lets look at the effect of it on this photo of the chicken.

This is a photo of the chicken using a linear exposure:


You can see the straight line on the right side. (You can also see the histogram. This is something we will get into in a later lesson) Now compare that photo to the one below.


This is the same photo with the highlights and shadows a bit crushed:


Now, you can see the line isn't straight. It is a bit curves, and you can see the result in the colors when compared to the linear photo. Both of these images came from the same image out of the Nikon D200. With this in mind, overdoing contrast is as bad as underdoing it. Keeping in mind the mantra, "all things in moderation," and you'll be fine.

The next lesson will be reading, understanding and interpreting the histogram. Your on camera tool for good exposure.

Friday, April 25, 2008

Shutter Speed. The Last Leg of the Exposure Race

In previous entries we discussed the uses, shortcomings and merits of the other two parts of exposure: aperture and ISO. Both of those two variables are crucial to being able to master your own exposure needs, and to create what is popping into your minds eye. The last consideration of exposure, from a technical sense, is shutter speed.

Shutter speed is the speed in which the shutter opens and closes. In the pipeline analogy of previous lessons, Shutter speed is the time that elapses after you turn the spigot on and when you shut it off. In photographic terms, this could be between 1/8000th of a second and a few hours time. Of course there are photos who exceed both of those ends of the time continuum but they are pretty rare at present.

In the same way that going up another step in ISO and opening your aperture one stop can allow you to change your exposure in a precise manner, halving your shutter speed can precisely reduce your photographs exposure by one stop.

Below are typical shutter speeds by full stop change:

* 1/1000 s
* 1/500 s
* 1/250 s
* 1/125 s
* 1/60 s
* 1/30 s
* 1/15 s
* 1/8 s
* 1/4 s
* 1/2 s
* 1 s


(There is something called reciprocity failure that prove these rules untrue, but it goes back to when you re making photos that are either very very long or very very short. So for the sake of these discussions, it won't be addressed)

Now that you know that, you might be wondering how shutter speed affects your photography. The answer is, it depends. Not only does shutter speed affect exposure, but it affects how blurry or sharp your photos are. Pick a shutter speed that is too low while you try to hand hold your camera and your photo will be 'soft' or even flat out blurry.

How do you know what is a safe shutter speed? We will get into that in a later entry but for now, if you re shooting with a cropped sensor SLR (nearly all of them are) assume that if you are hand-holding your camera (no tripod, monopod, resting on a tree, etc) you need a shutter speed that is 1/1.5 times your focal length. Therefore if you are trying to shoot a photo with a 50mm lens you should maintain 1/75th of a second. If you have a 500mm lens, you should maintain 1/750th of a second, and so on. (my photography advisor recommends 1/x*2! making it 1/100!) Below are some examples The Bauer Gallery Chicken taken with different shutter speeds using a 50mm lens on a Nikon D200.


1/200th of a second @ 50mm


1/45th of a second @ 50mm


1/2 second @ 50mm


How else does shutter speed affect your photo? Well, perhaps your photo IS in focus but your subject is moving rapidly across the focal plane. This will result in a blurry photo, but, the main subject will remain sufficiently in focus. Below is an example of this effect. The subject remains acceptably in focus, while the background blurs with motion.

DSC_3201


Hopefully now you can begin to see the relationship between shutter speed, aperture, and ISO as it related to exposure. A full step change in one should be the same as a full step in the same direction from one of the other choices. In kind, a one step decrease in one, and a one step increase in another, should render a similar exposure as your original image. In following episodes we'll explore more of the camera and how to get yourself permanently out of automatic mode and taking photos that your friends and family (and maybe even clients) will be wowed by.

TBG

Wednesday, April 23, 2008

Opening Up Aperture's Mysteries

In the last lesson we discussed the secrets behind ISO and how to adjust it to serve your purposes. One of ISO's brothers-in-arms is aperture. Aperture is represented by an f-number. You might have seen something like f5.6 or f32 on a Flickr site and wondered what it was. Well, what you were looking at is the universal way to express the camera's aperture at the time of the photograph. Aperture is the second leg of getting a proper exposure and this lesson will explore it for you.

Aperture, simply stated, is similar to a water pipe. If you have a small pipe you can move a small amount of water through it in a given time. If you have a large water pipe, you can move a larger amount of water through it in that same given time. Aperture in the camera lens works in the same manner. Have a small aperture and have a small stream of light flowing onto the sensor. Open the aperture wide open and get a flood of light flowing onto the sensor. Seems easy enough, right? Well, it is, for the most part.

As with other photographic concepts, the logic behind them is solid and useful but the vocabulary is a little convoluted. If you are new to a more advanced level of control of your camera, you could be a little confused by it all. The first concept to grasp is, as the f numbers get smaller (like f1.8) the larger the "pipeline" of light is. And likewise, the larger the f number (like f22) the smaller the "pipeline" of light is.

So what does it matter what aperture you shoot things at as long as the exposure is correct? Great question. The answer is many and varied. In addition to regulating the amount of light hitting the sensor, aperture can control many other creative aspects of a photograph.
Remember, once you master the concepts, you can begin to control them to do your bidding.

Probably the most common side effect of aperture is how in-focus the background of photograph is. This, in photographic circles is called "Bokeh".

Main Entry: bokeh
Part of Speech: n
Definition: a Japanese term for the subjective aesthetic quality of out-of-focus areas of a photographic image
Example: The bokeh, or quality of the blurred image in the photograph, was described and discussed.


How does one get a photo with that nicely blurred out background? You open up that aperture wide baby! Now, here comes the rub: Unless you're using prime lenses, (Prime lenses are lenses that do not zoom. They are a fixed focal length) zoom lenses with a very wide aperture are pretty pricey. (Check out a f2.8 Canon zoom lens' price tag sometime!) The good part of this story is, prime lenses are less expensive and usually very well made. Nikon, Canon, and the like have been making those for a long long time and have the process down, and you can reap those rewards. I think a serviceable f1.8 50mm Nikon Nikkor lens is under $100.

One trade off of this great bokeh is how much of the photo IS in focus. The wider the aperture (the smaller the f-number remember) the less of the image is going to be tack sharp. It's possible, depending on a few factors, that you could have 1 inch of focal depth (or less!) in an image with a very wide aperture.

Checking out the calculations from a very handy website:

http://www.dofmaster.com/dofjs.html

Assuming I'm using a Nikon D200, a 50mm lens, with an aperture at 1.8:

If I stand two feet away from the subject, the acceptable focus range is .02 ft in front of and .02 feet behind the subject. That equates out to a total of 1/2 inch of focal range. 1/2 Inch isn't even enough to keep an entire face in focus. So, use that bokeh carefully!

Knowing all that, what is the flip side of using a very small aperture? Strictly speaking in terms of photographic performance, the smaller the aperture you use (remember, larger f-number) the more of the photo will be in acceptable focus. (We'll get into what is acceptable focus and all the terms for that in a later episode)

There is another side effect of a small aperture. when stopping your lens down a great deal (which is the common term for making your aperture smaller) is that your lens is forced to bend light a little more than it wants to. The result is called Chromatic Aberration, or CA for short. How you can tell if your lens is suffering from this syndrome is you will notice small color shifts at the edges of objects in photos where there is a dramatic change in light, such as the edge of a dark building on a very light sky. The aberrations will typically be red or blueish in color. Many times they aren't that noticeable sometimes they require a little adjustment in post-production.

Most lenses would be happier operating in the mid range when it comes to aperture. The highest level of sharpness will be achieved this way, and the odds of aberration will be the lowest. Typically people regard f8-f11 as the ideal. And, depending on the quality of your lens, a well above average result can be had from f2-f22. Granted these are typically on the higher end zoom lenses and your more average pro-sumer lenses will be happier with a bit smaller range, say.. f5.6 to f16.

Now, how does aperture relate to ISO and exposure? This one is cool. Remember in the last post (ISO ISO it's off to work I go) When you took a photo and it looked to be underexposed. And your solution was to raise the exposure of the photo one exposure stop, so you raised the ISO from 100 to 200? Well, you now have another option to that scenario. You could open the aperture one stop and achieve the same effect.

The table of 'full stops' as it pertains to aperture is as follows:

0.5 0.7
1.0
1.4
2
2.8
4 5.6
8
11
16
22
32
45
64
90
128

So, going back to our previous example, you were shooting a photo at f8. If you wanted to let more light into the exposure to the tune of 1 stop you would open the aperture to f5.6. This, as far as exposure goes will give you the same effect as changing your ISO to 200. This is one way to illustrate that there is more than one way to skin this exposure cat. The next lesson will connect these two concepts with shutter speed and you will have the triumvirate of exposure down!


Tuesday, April 22, 2008

ISO ISO its off to work I go

Part I of III in the 'How Does This Camera Work' section:

Back in the cave man days, film was divided into sensitivity levels using the ASA - ISO method. The higher the number, the higher the sensitivity to light. Film could range from 25 ISO to 3200 ISO and beyond. And each type had their own uses in photography. The trade off to sensitivity was the size of the film grain. The more sensitivity you needed, the bigger the grain and the more grainy your photo looked.

For many new photographers, this is a huge concern. Just do a 
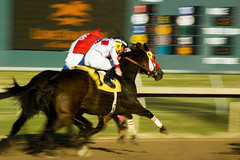
Google search and see the debates that rage over ISO sensitivities and comparisons between models, etc. Each time I asked a professional photographer about it, they just laughed and patted me on the head. One of them said, "Young grasshopper, you have much to learn. Forget about ISO and get the shot." My photography instructor said, "There was a famous photographer that took photos of NFL players in the 60s. He was using some ridiculously high ISO film. The grain was as big as beach balls and they still put his images on the side of buildings in Times Square."

Coming from a large format printing background I was concerned with grain because many of my images were being blown up to 80" on the short dimension and grain became plainly clear. And approximately a year later I learned. They were all correct. The age old photojournalists' phrase, "f8 and be there," has some real merits.

Now, one thing about ISO (and something you will find relates to a lot of photography) is you can use it precisely to properly exposure your photos. It does follow a bit of arcane methodology and wording, but I think you can pick it up. Lines of demarcation in photography happen when taking about light in terms of "stops". Each stop allows 100% more light into the camera than the stop before it. And it allows half as much light as the stop after it. Therefore, film that is 100 ISO is half as light sensitive as 200 ISO film. And 200 ISO film is half as sensitive as 400 ISO film. etc. There are half stops and, with digital cameras, 1/3rd stops, but, once you understand these rules, the fractions make sense in the big swing of things.

When trying to determine exposure for an image, as mentioned in other posts, you need to factor in 3 aspects: the amount of light hitting the sensor, the duration of time that it is allowed to hit it, and the sensitivity of the sensor itself.

ISO deals with the sensitivity of the sensor. Lets say you were exposing an image using a photograph that was taken with an aperature of f8 and an exposure of 1/60th of a second. Let's also say you used a sensor sensitivity of 100ISO. Later, when you looked at the image in your favorite digital imaging program (Lightroom, Photoshop, Etc) You notice it is under exposed. You'd like to raise the exposure one stop. One option is raising your ISO from 100 to 200. This will double the amount of light allowed onto the final image. If you still think it is underexposed, you can raise the ISO to 400. This allows double the amount of light sensitivity as ISO 200 did.


Having said all that, do I think ISO matters at all? Sure it does. It matters if you're comparing a Nikon D40 to a Nikon D3, or a Rebet Xti to a 5D. A cropped sensor (what most SLR cameras have) compared to a full frame sensor is hardly a fair ISO fight. And if you have the need, (something most people don't) and the funds, ( something more people have, than the need) major shifts in ability are worth noting. But, one stop of improvement between this CMOS sensor compared to this CCD sensor isnt. Spend that time shooting photos, experimenting, learning something new about lighting or composition, or looking at other people's photography and learning from it. One major problem with "pro-sumer" photography is that people think the equipment is inferior. 9 times out of 10, it's not. To borrow a phrase from the auto racing community. The main part that needs improvement is usually the nut behind the wheel.

Friday, April 18, 2008

How Does This Thing Take Pictures Anyway?

Before we can learn how to get out of the dreaded program mode and into the real meat and potatoes of the photography industry we first need to take a moment to learn (or refresh your memory) about how exactly a camera takes a picture.

The idea behind the film camera and the digital camera are very simple. Allow a certain amount of light to hit a certain sensitivity of media for a certain amount of time. In film, this was achieved by allowing light to strike tiny silver halide molecules that were suspended in an acetate backer. The silver halide would change physically when struck by light. The more light there was, the stronger the change was.

A long time ago when there was no color film, there was only one layer of these crystals which meant they reacted to the entire spectrum of light and color. As such, you could only have a one color image, white and shades of non-white. (Black and White). Soon after, it was discovered how to make film with layers of crystals that would only react to a specific color spectrum. And with this, color film was born.

With digital cameras the theory is the same, you have just replaced the film with what is (for now) a 3 layered sensor. Each layer detects it own color. And when you're done, you'll have an R (red) G (green) B (blue) image.

Now, how does all this relate to your Rebel XT? In order to begin to take photos correctly you have to consider the triangle of exposure:

1. ISO (or the sensitivity of the film/camera sensor)

2. The amount of light you want to let into the camera (the aperture)

3. And how long you want to let that light hit the sensor (the shutter speed)

Each one of these variables also has other uses, which we will explore in depth later. But, the main idea is once you know how to control these things, you can use them to do your creative bidding.

Wednesday, April 16, 2008

Getting out of Program and Automatic mode on your camera!

One of the smartest things I've read was from a photographer who commented that arguments between photographers over ISO noise, the latest new gadgets, wizards, and brainpower in a camera were left to those who would never use a camera to it's potential. It's funny because after spending some time in the industry, you find out it's true. I used to be one of the people, too. Sure a full frame and super high ISO can do things other cameras cant, and maybe the Nikon D300's camera has a more intuitive autofocus than the D200, but most of the time, these points are irrelevant to how good or bad your photo is.

I've got a small fleet of Nikon cameras at my disposal and I think the my best photos were taken with some pretty pedestrian settings. The photographer who taught me the most about raising the level of my photography used a pretty old and tired camera. I think it was a D70. But, his D70 would routinely punish a lot of the average D3 users' output.


Outside of a snapshot or a quick one off demonstration, I would never use program mode (or any of the cute little pictographics drawings on the setting dial). You can see here, my infrared camera is set on aperture priority. I might rescind my comments if I was running around with my flash on camera with no time to make any setting adjustments. I know lots of event photographers who do this, and it might be the best thing to do in those situations. But when you can get away from it, you definitely should.

Looking at photography in it's simplest form, it's nothing more than capturing light (or lack thereof) and how it falls onto a subject. And you don't have to use whatever light mother nature (or Thomas Edison) is giving you. In fact, I would strongly suggest you add your own. Light should be a major consideration when trying to take a superior photograph. Compositional tools, mood, and perspective should also enter in the conversation too. And of course, once you learn all the classic rules, you learn how to break them to your benefit. Clear as mud, eh? Hopefully in the coming weeks it will become more clear!